

How To Set A 330 Conibear
- Home
- Fur Traps
- Conibear Safety Gripper
Conibear Safe Gripper
This post may incorporate affiliate links so I earn a commission.
A conibear rubber gripper is a trapping safety tool that everyone should own.
This small, simple and inexpensive device could save you from astringent injury or even death.
Many trappers utilise body gripping traps commonly referred to as conibear traps to target muskrat, mink, otter and beaver.
The design of the torso gripping trap is pretty simple.
Two metal square jaws are hinged together and they're powered by i or two springs.
The "domestic dog" is fastened to a trigger which holds the ii jaws open in the set position.
Equally the animal passes through the trap, the trigger releases and the springs compress the jaws around the animal.

The conibear is referred to as a "kill trap" and many states merely allow them to be used under water to avert adventitious catches of non-targeted species.
Make sure to bank check your local laws and regulations to see which sets are legal in your expanse.
While the smaller 110 sized conibear only uses one spring, the larger 220 or 330 sized traps utilise two springs and are very powerful.
In fact, the larger traps are and then powerful that even the most experienced trapper volition go a piddling nervous when setting one....I know I always practise!
Why Trunk Gripping Traps Are Dangerous
You should always be careful when treatment and setting a body gripping trap.
The size and strength of 220 or 330 trap is zero to joke about.
The large springs on a 220 or 330 trap are strong and difficult to shrink by mitt.
A majority of people need to use tongs to compress the springs to ready the trap.

If yous attempt to set the trap and you catch your finger, hand or wrist it's nigh impossible to compress the springs with your one costless hand to release yourself.
To brand things even more than dangerous, these larger traps are used in under water sets.
A caught manus, under water, in a securely fastened set is bad news.
Get in Condom - Employ A Conibear Prophylactic Gripper
If you apply one of these larger style conibear traps you should always use a conibear safety gripper.
Don't wait until yous have a "near miss" to realize you should utilise i.
How do they piece of work? They're actually pretty simple.
The device only clips over the jaws of the trap to cease them from closing if the trap is accidentally sprung.
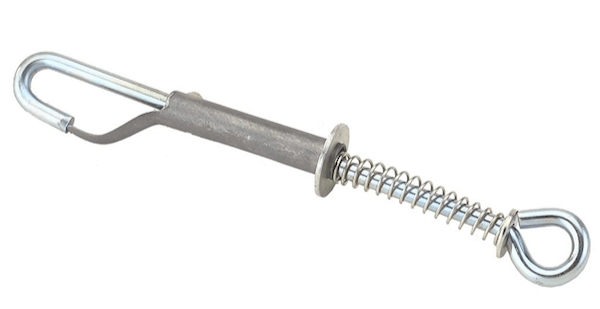
If the trap does accidentally burn, the prophylactic gripper will prevent the jaws from closing on your hands.
Since the device is made from metallic it will rust a little only with a piddling care and maintenance information technology will last for years.
Here'south one important slice of advice....since you will be near or in the water when using the gripper, tie a rope, lanyard or bladder to it!
Once yous driblet information technology in the water (yes at some bespeak you lot will) the metal device will sink to the bottom and you'll loose it if it's not tied to something.
I tie mine to a rope and then but tie the other cease of the rope to my vest or waders.
That way it's e'er with me and even if I drop it I won't loose it.
Overall
A conibear rubber gripper is an inexpensive tool that every trapper should ain.
Those who have trapped for a while probably know someone who's had a shut call with a conibear.
Don't wait for an accident to happen. In one case you lot showtime using one of these simple fiddling devices you'll never stop.
Setting a large 330 conibear for a beaver or otter will always make your eye beat a little faster due to the size and power of the trap.
A safety gripper makes setting the trap safe and it's a tool that you should accept along with you every time y'all head out on the trapline.
Source: https://www.trap-anything.com/conibear-safety-gripper.html
0 Response to "How To Set A 330 Conibear"
Post a Comment